How to Use Planoly to Schedule Your Pinterest Pins & Social Media Posts: Pinterest Scheduling Tool Alternatives
November 6, 2021
Did you know that you can use Planoly to schedule your Pinterest pins? I have a series on my channel where I go through all of the Pinterest-approved schedulers and review them for you, so that you know if they will be a viable option.
So, today I will show you how exactly to use Pinterest and Planoly together to schedule your pins and possibly use a scheduling tool that is not Tailwind. If you are interested in that, let’s dive right on in.
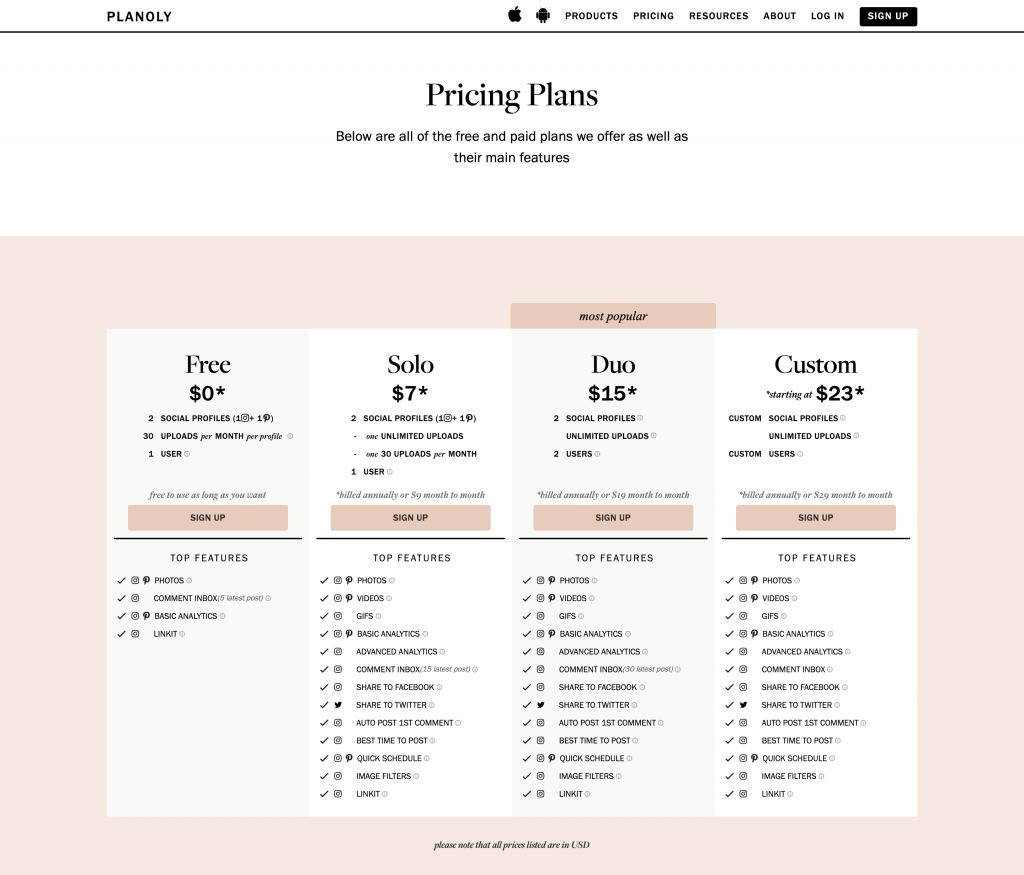
Pricing – $9 per month for the solo plan
There is a ‘free as long as you want’ option, so you’ll look at that in this tutorial. This option gives you 30 uploads per month per profile, and it looks like you can schedule with Pinterest. So let’s choose the free plan.
To sign up, you will need to input all of your information. You can also input a referral code and then click ‘sign up now.’
You can do a seven-day free trial of the solo plan. For the solo plan you get unlimited uploads on one account and 30 uploads on the second account. It looks like this will be really good for someone solo managing a very small Instagram presence and a Pinterest account.
Then you’ll set up your billing information before starting to use the actual tool itself.
RELATED: Manual Pinning Strategy vs Scheduled Pinning Using Tailwind
How to connect your Pinterest account?
You are going to next connect our Pinterest account. It will pop up a window, and it will have you sync them together. You will give access and then you have to tell them who you are and what you do, always for their own data research of their own customers.
Once you are inside the dashboard, you will go through another cool feature: the chrome extension. It makes scheduling so much easier. Click to add the chrome extension to your bar. You will need to pull open the puzzle piece and favorite it so it’s always right there in your chrome bar.
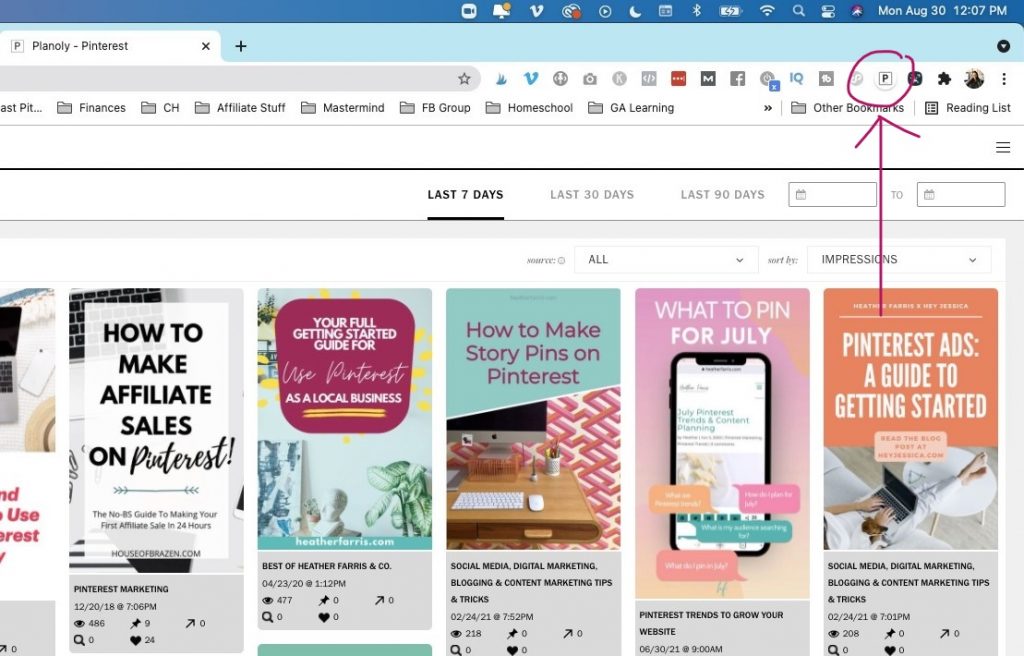
Once you have finished signing up for Planoly, you will be greeted with an empty dashboard screen. There is not going to be anything here if your account is brand new.
How to set your schedule?
To start scheduling pins, you can do this in two ways: using the chrome extension you just setup, or the native campaign builder inside Planoly.
Method #1 – Planoly extension
Method one is simply going to your finished blog post or shop item and hovering over the image you want. After you have the Planoly extension installed, their button will pop up. If you have a problem getting your Planoly button to pop up on your content, you will need to refresh the browser that you are on.
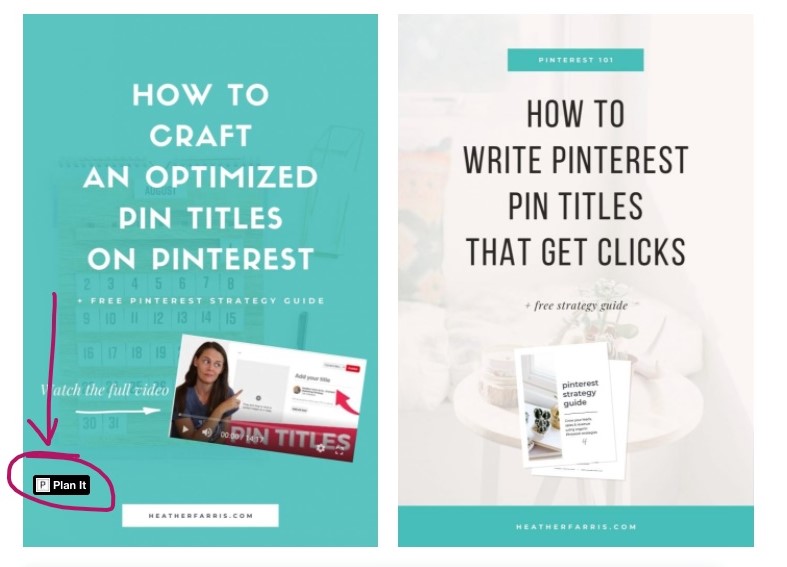
Then you are going to click plan it. This is going to pop up a screen, and it is not going to come pre-optimized. You are going to have to optimize it yourself. Paste your pre-written pin title and description. The pin URL already came over or the content URL. Then you are going to select the board that you want it to go to.
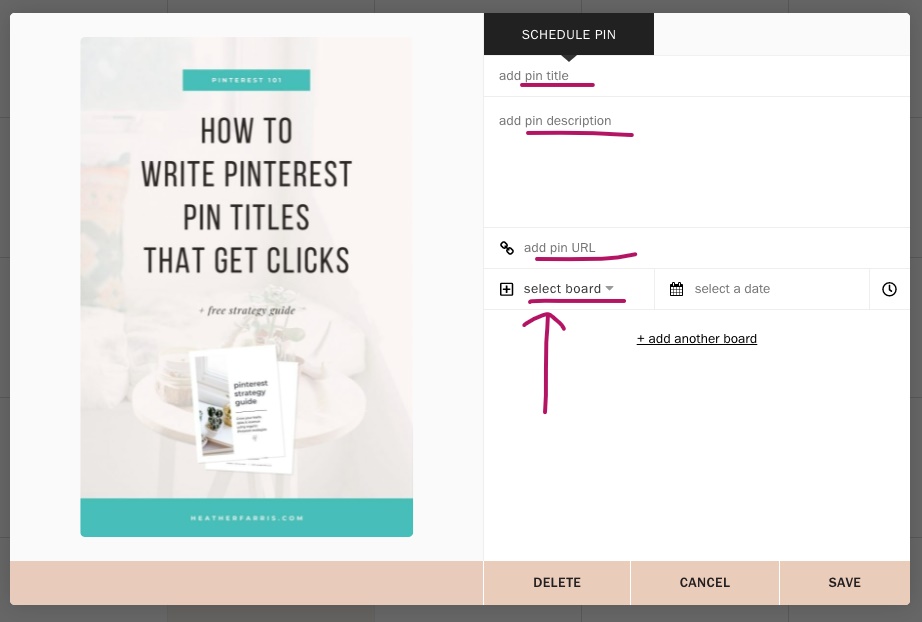
One thing to note over here is that you cannot easily see whether or not the board you select is a group board or a board you own. You will want to know what your boards are by their title, whether they are group boards or not, especially if you have a lot of group boards on your profile.
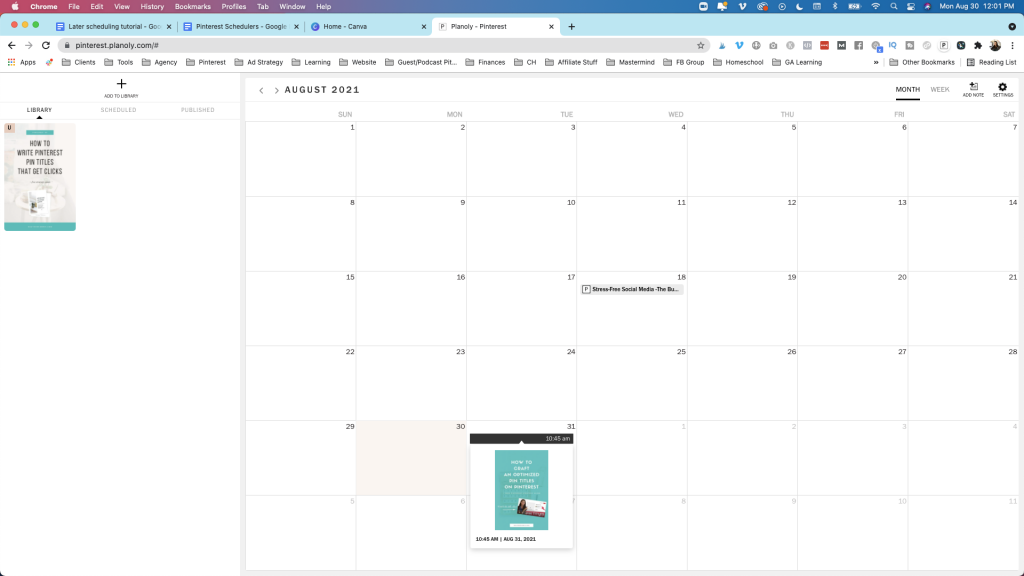
Now you will go ahead and click on a scheduled date that is more than 5 or 10 in the future. You will see you can add new custom time slots if you want to. Then click save and it will be listed in your schedule for you.
RELATED: How to Write Your Pinterest Descriptions to Get More Clicks & Rank Higher
Method # 2 – Set up a campaign
Method number 2 is actually setting up a campaign. Campaigns are really nifty with Planoly. I like this feature; as long as you are not utilizing the same piece of content repeatedly, and you are utilizing fresh pins. This will allow you to schedule your fresh pins with that minimum of a 30-day interval very easily.
This also allows you to schedule and turn on a campaign in advance of a trend happening on the platform. For example, Thanksgiving is coming up in November in the US. So you will be able to go ahead and upload all of your thanksgiving content, get it in your schedule, and have it scheduled out and ready to go before that time comes. So you have a lot of pre-planning capability with this tool, which I like.
Click ‘Create Campaign,’ and you will name it, then give it a pin title description and a URL.
RELATED: 10 Ways to Drive Traffic from Pinterest During the Holiday Season

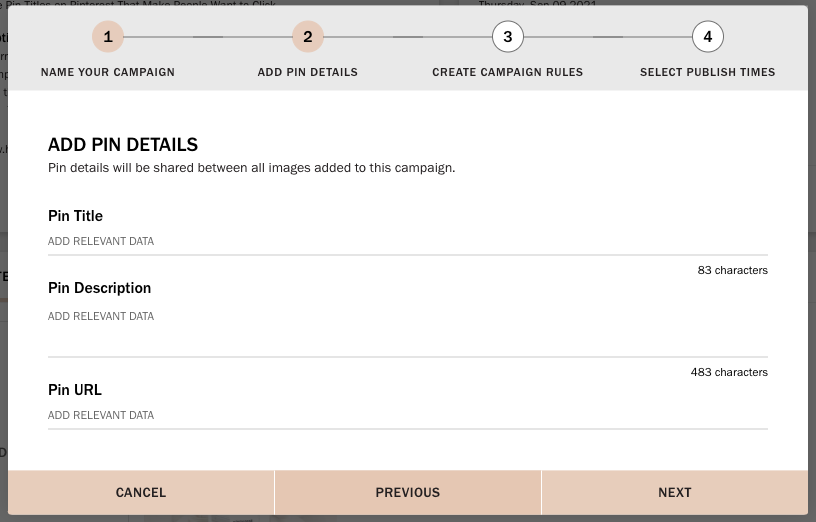
If you create a campaign using their feature ‘Campaign Building’, you will use the same title, pin description for every pin that goes out. So, it will go to the same place using the same title and the same description.
Now, this is really good for AB testing. If you have 15 pieces of content for Thanksgiving, you will need to create 15 campaigns. You cannot just create one campaign and have all of them going.
Know that you will need to be a little more organized and have this stuff done upfront, so you are ready to go when it is time to publish.
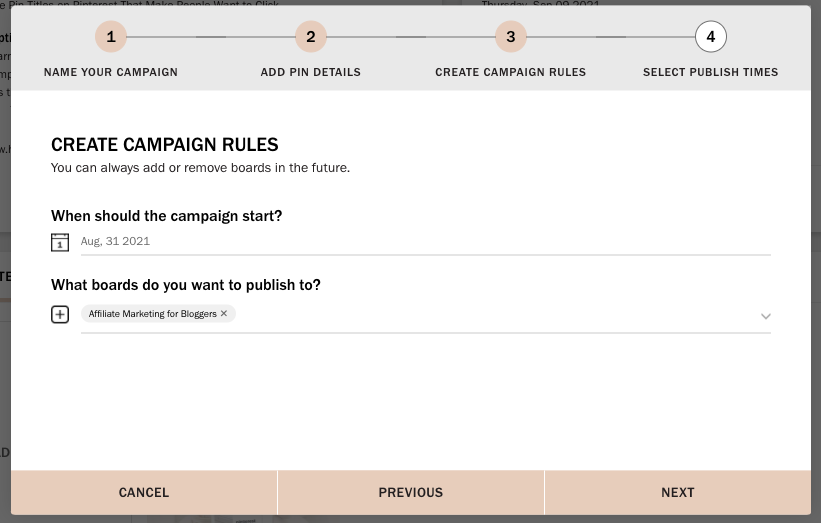
It’s going to ask you ‘When should the campaign start?’ Let’s say you want this campaign to begin on the 9th, and it’s going to have you add in all of your boards that you want it to go to.
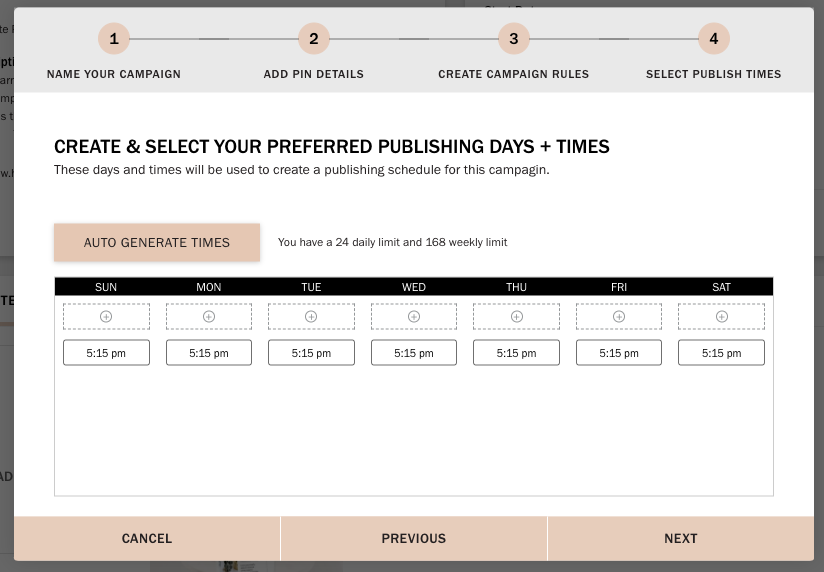
Then you are going to auto generate the times. Based on analytics, it’s going to assign smart times that it deems best and you can select a few other different options.
Now start adding your content. You actually have to upload your content. Unfortunately, you can’t use the chrome extension for this. So all of your content for your campaign will need to be either in your dropbox, on your computer, or Google drive.
There is a feature where you can go ahead and create your images from Canva right inside of the tool. This is a nifty feature, but you have to make sure you have it slotted into your process. So using Canva inside of Planoly needs to be a part of your workflow.
Pull in that Pinterest image that is already saved on your computer. Click ‘save’, and it is going to load in there. Now because you already set up your campaign rules and set up your titles and your description, your URL, it will automatically go ahead and add them to your queue.
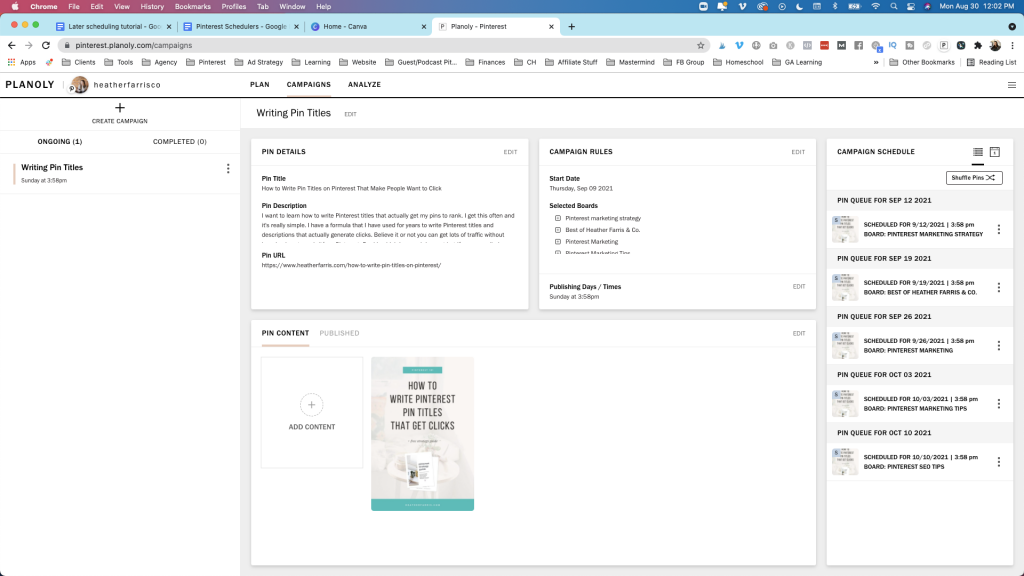
It looks like you are pretty limited; you can’t actually set up a 30-day. You can do a one-day to a seven-day interval, and that’s it. That’s how you use these scheduling features inside of Planoly.
What analytics are available inside this tool?
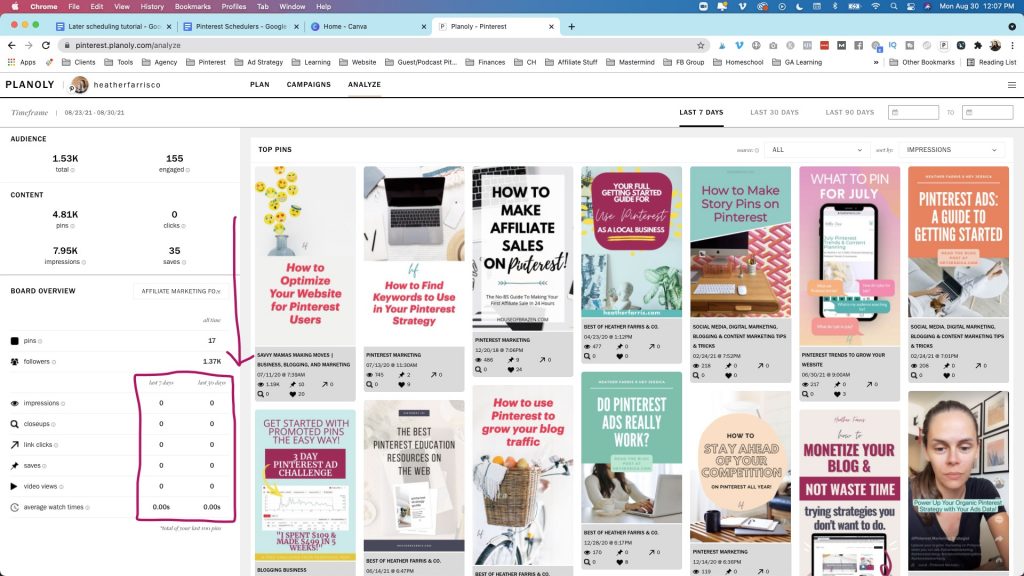
Now you do have an analyzed section of their tools where you can look at your audience and find out:
- How many people are engaged?
- How many people have clicked on your pins?
These are your basic analytics for Pinterest and it will only start generating data for you from within the tool. It doesn’t pull analytics directly from your Pinterest account. If you want to see your Pinterest analytics, I encourage you to look at your Pinterest account.
You can see here with my new account barely setup, it’s showing no clicks or activity even though I’ve had activity in my Pinterest analytics for years. So don’t be confused, rely on your analytics directly inside of Pinterest.
That’s how you can use Planoly to schedule your Pinterest pins in two different ways.
Final thoughts
Now that you know how to use Planoly to schedule your Pinterest pins, if you are interested in signing up for Planoly, you can go to heatherfarris.com/planoly and give it a try today. So, that’s my affiliate link. If you use that, I will make a tiny little commission.
I think you are going to like it. I love it. I decided to keep Planoly for my own Pinterest scheduling needs. If you would like to hear my full thoughts on Planoly, watch my Pinterest schedulers tutorial. I tested four Pinterest schedules, so you don’t have to.
RELATED: Pinterest Analytics: A Simple Guide to Read & Analyze Your Data
RELATED: Pinterest 101: How to Use Pinterest Marketing for Beginners
Pin It For Later
Heather went to school for accounting and worked for years in banking and finance. After finding all of that entirely too boring she started her first blog in her basement in August of 2016. She has started 3 blogs in the marketing, motherhood and travel niches and used Pinterest to grow them all. She quickly became the go-to Pinterest strategist in her peer circles and has been implementing strategies, driving traffic and sales through organic and paid tactics for her clients. On this blog and her YouTube channel she educates the public about clear and transparent marketing strategies to help them to grow on Pinterest and in other places online.