Heather is a seasoned
Pinterest marketing expert & educator using the platform since you could reach the bottom of the feed - 2010.
About Heather Farris >
How to Use Buffer for Pinterest Scheduling
December 7, 2021
Did you know you can schedule your Pinterest pins using Buffer for as little as $6 per month? It has to be one of the most affordable Pinterest scheduling tools that’s an approved partner that you can use to automate your Pinterest strategy.
It is a very easy-to-use tool for scheduling, uploading your content, ease of use, and getting around. I will show you how exactly to schedule your Pinterest pins using Buffer in today’s post. So let’s dive right on into this tutorial.
How to connect your Pinterest account?
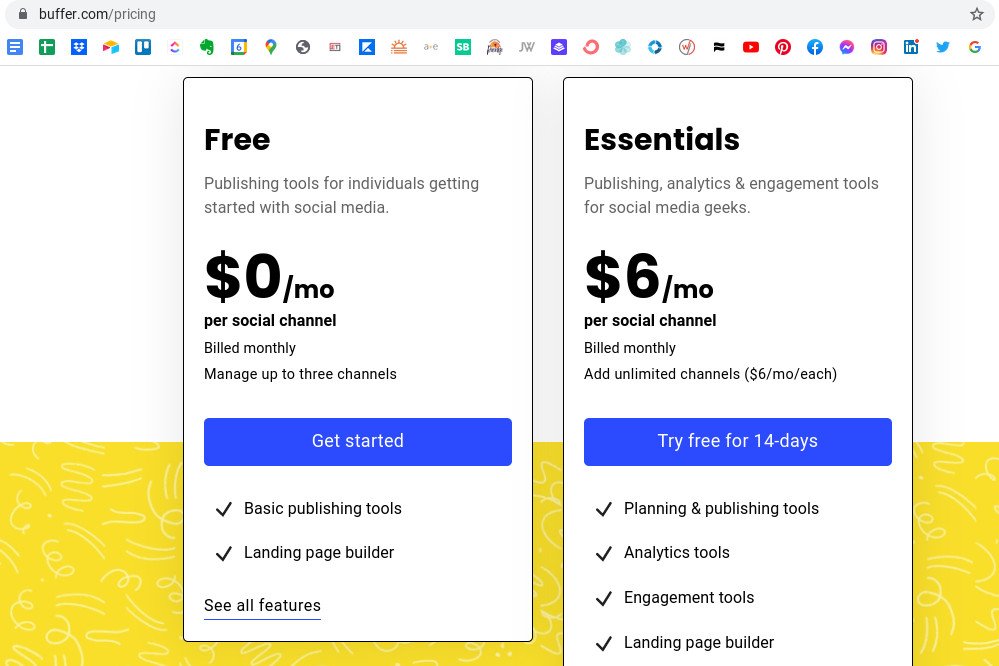
You can get started with a free trial for Buffer, and select to pay for it monthly. So it will be $6 per month on their Essentials Plan. And this is a $6 per month per social channel that you can try for free for 14 days.
When you get started, the intro tutorial is going to take over. It will say, “Let’s connect your Pinterest account.” It is going to take you to a screen where you can select to connect it.
Once it is connected, it is going to bring up your Pinterest account. Give it access and then you can hop over to your website or content and get a blog post opened up. We’ll pin from here in a later step, so have it ready.
How to set up your schedule?
Buffer already has a built in schedule, but the time zone is likely incorrect. Change the time zone to be in the United States.
This works great for all my overseas people who are publishing for US users. You can actually set a US time zone for your publishing schedule to ensure you publish to the highest activity areas.
Then you want to add posting times. You can clear all posting times quite easily and add them back in however you like.
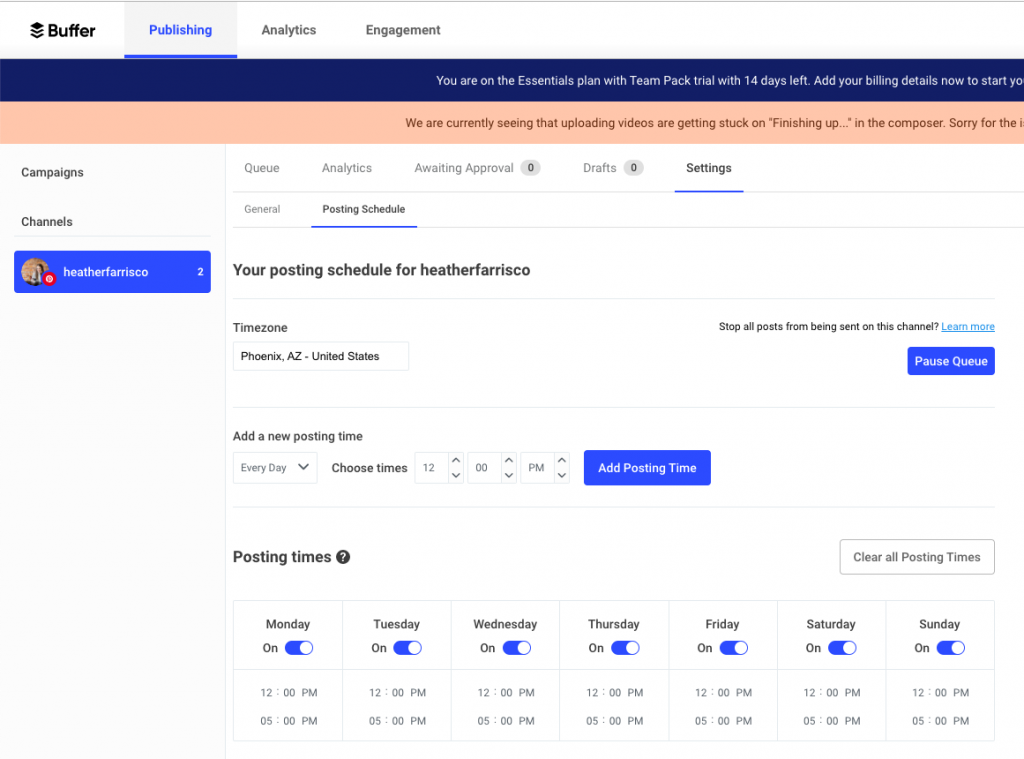
Your posting times can alternate however, or even stay the same everyday, just customize it how you want to start. One thing I do not see available is a smart scheduling option, so you’ll need to manually set times.
Now that you have your schedule set up, you’ll want to look at uploading our content.
How to upload your content?
One thing most apps like this give you is a chrome extension. So I wanted to make sure if there was a chrome extension as an option. In fact, there is.
Go ahead and add that Buffer chrome extension to your bar. If you use another browser like Safari or Firefox, you will want to search in their help docs to find that extension.
In their help docs section you can find the Buffer extension right there. You will need to move it up and pin it to the chrome bar so that you can see it.
Now it is the time to schedule content. I tested this out in two different ways.
RELATED: I Tested Pinterest Approved Schedulers So You Don’t Have To
Manual upload
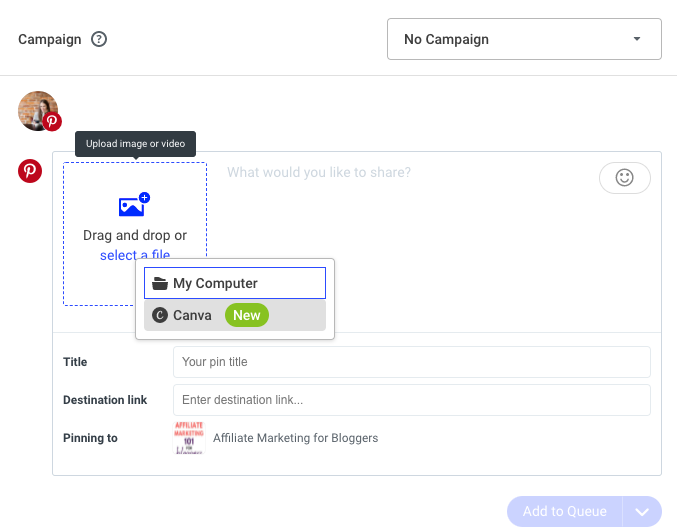
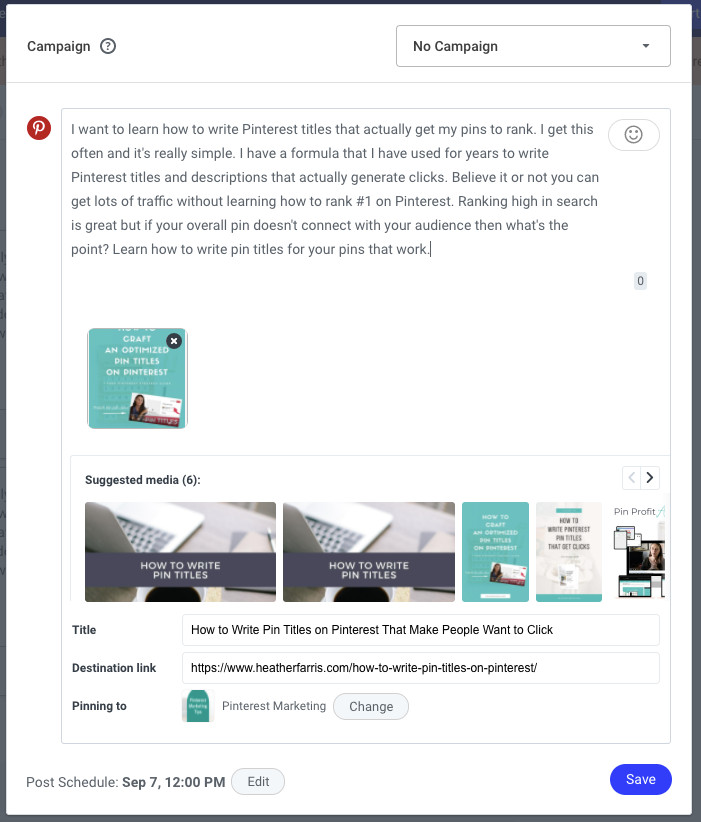
In your queue choose Pinterest. Then you are going to drag and drop your Pinterest image. Then Buffer is going to have you give it a pin title and description. It pulls up a description box, so you are going to put your description in there.
Give it a pin title. The pin title can actually be your blog post title. Add your destination link and then add it to your queue.
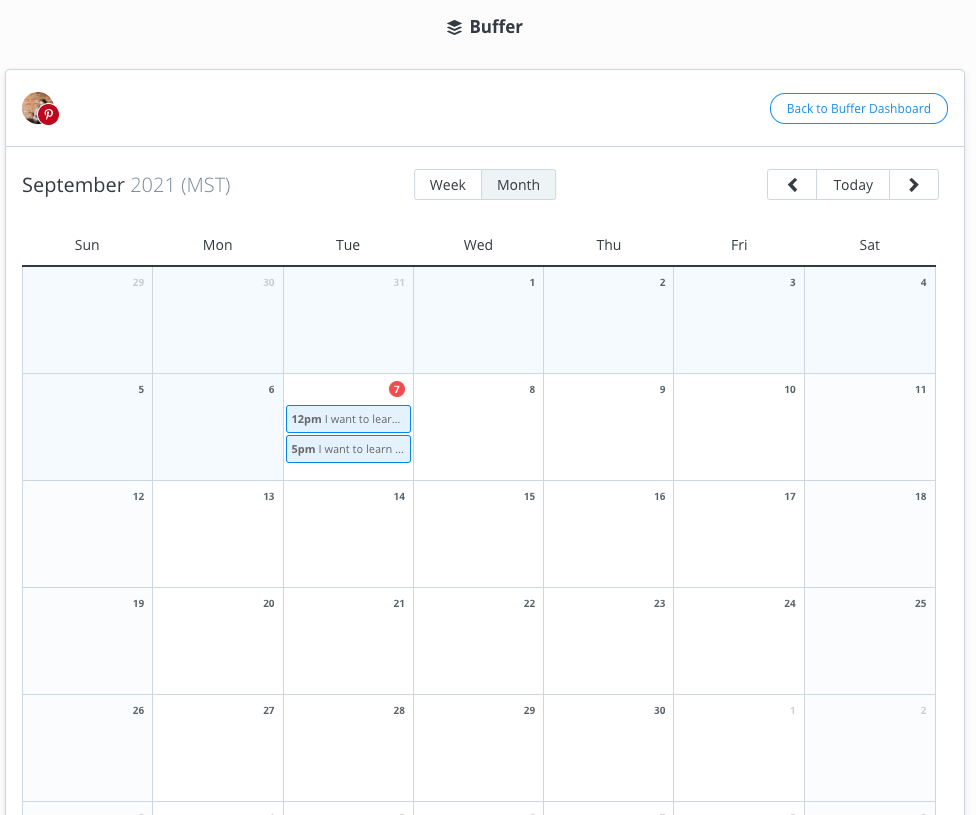
If you toggle over to your month view, you can see your content by month. You will be able to see your content listed here, in week and month formats.
I really like the option to be able to see that in that way. This is really good if you are a Pinterest manager, managing for other people just so that you can show them how their queue looks.
Chrome extension
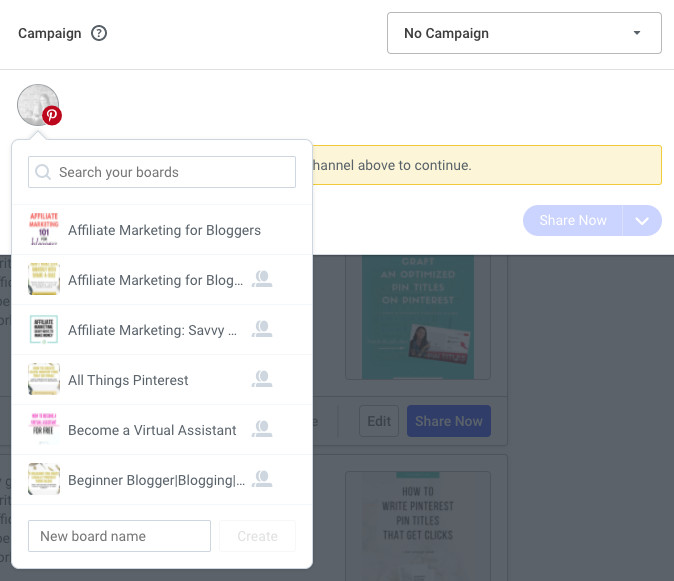
To use the Chrome extension, go to your image in your blog post. Go to Share Image, and then you are going to choose a board from your Pinterest account.
The extension does not pull all of the data you may have optimized through your blog post. So you will have to add your image to the cue and then edit the details the same way that you did manually before.
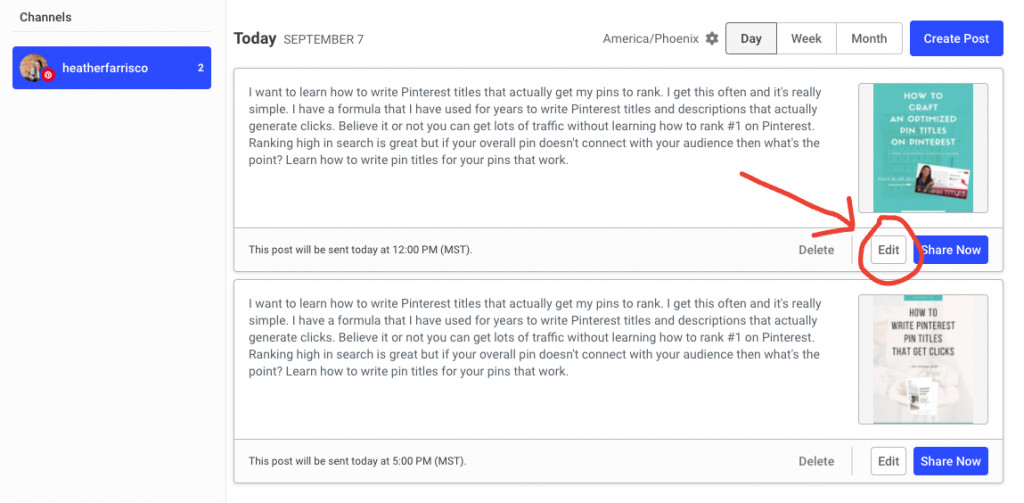
Head back over to your cue and refresh your screen. You should be able to see that image your extension placed in there, and then you will be able to edit it.
This isn’t the most intuitive way. I’m not a huge fan of how it’s not pulling descriptions through the already optimized image. The Buffer extension seems like a good feature, but it is not pulling through all metadata.
So honestly, as a Pinterest manager, I would rather have control over this like I do in other scheduling tools. I will just upload the images here manually, craft them and push them out. As a user, I would probably do the same thing.
That’s how you upload and optimize your content in Buffer.
How to edit your content once it is in the queue?
The editing of posts after scheduling seems to be pretty straightforward. There is just an editing button there, and then you would press save if you wanted to save any changes you made.
What analytics are available?
Over in the analytics tab at the top, you will be able to see some of the analytics per platform. Buffer analytics works with Facebook, Instagram, Twitter, LinkedIn, and Shopify.
One negative component of this tool that I am not a fan of is that you won’t be able to see the bulk of your data in a snapshot. But that’s okay.
RELATED: Pinterest Analytics – A Simple Guide to Read and Analyze Your Data
Final thoughts
So that’s how you use Buffer to schedule your Pinterest pins. If you liked this tutorial and got any value from it, do leave a comment.
If you enjoyed reading this post, I encourage you to see my Pinterest schedulers review video where I tested four approved Pinterest scheduling tools, so you don’t have to. See you next time!
Pin It For Later

Heather Farris went to school for accounting and worked for years in banking and finance. After finding all of that entirely too boring she started her first blog in her basement in August of 2016. She has started 3 blogs in the marketing, motherhood and travel niches and used Pinterest to grow them all. She quickly became the go-to Pinterest strategist in her peer circles and has been implementing strategies, driving traffic and sales through organic and paid tactics for her clients. On this blog and her YouTube channel, as a renowned Pinterest marketing expert, she educates the public about clear and transparent marketing strategies to help them to grow on Pinterest and in other places online as a renowned Pinterest marketing expert.




The dilemma here is what about people who aren’t using Chrome, or are on strictly “mobile” devices like tablets. The buffer plugin isn’t available on ANY browser. Thankfully the buffer APP does most of the same things, and faster too… the Buffer website is NOT mobile friendly, not in screen size, or in speed.
One handy point I’d like to add. If you’re mass-producing Pins (or Tweets or anything else) in a group, and want to mix things up… well, I’ll just give an example…
Say you made 20 pins about coffee mugs. And another 20 about wall decorations. Then 20 for some greeting cards, and then just to not seem too spammy, 20 pins with inspirational quotes and another 20 with cute pets. Now that you’ve got all that in your queue, there’s a SHUFFLE feature under Settings/Schedule that lets you mix all those up. Though (1) it’s only available on thebsite, not in the app, and (2) it will only shuffle the first 200 items in the queue.
Hope somebody finds this helpful.