Heather is a seasoned
Pinterest marketing expert & educator using the platform since you could reach the bottom of the feed - 2010.
About Heather Farris >
How to Enable Rich Pins for Your Website (WordPress, SquareSpace & Shopify)
April 26, 2023
Did you just search Google, “how to enable rich pins”? In the following very quick tutorial I’m going to show you how to enable rich pins for WordPress using the Yoast SEO plugin. Plus, we’ll cover Squarespace and Shopify too. All are important no matter what platform you’re using.
Learn how you can get these installed and start making your pins more friendly for your audience. There is no more need to validate your rich pins on Pinterest if someone tells you to do that their tutorial is out of date.
What Are Rich Pins?
Rich pins are an upgraded type of pin on Pinterest that feed through extra meta data to the pin on Pinterest. This helps your pinner to see more about your pin, such as if it’s attached to a recipe link or a product you’re selling. They are commonplace on Pinterest now and automatic as long as you have the open graph feature turned on for WordPress.
It also adds a few more details to your pins:
- Blog post snippet
- Profile picture of pinner
- Follow button
- Site title
- URL on hover
RELATED: The Ultimate Pinterest Traffic Strategy for Bloggers & E-Commerce Shops
How to Enable Rich Pins on WordPress
Install Yoast SEO Plugin
Step 1: Head to your WordPress dashboard and go to your plugins. Then install the Yoast SEO plugin & activate it.
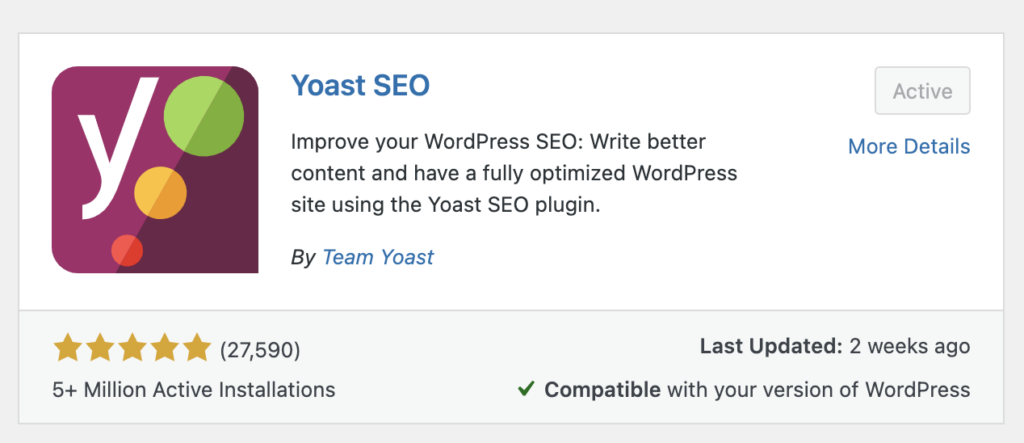
Step 2: In the sidebar of your WordPress website click Yoast, then choose settings.
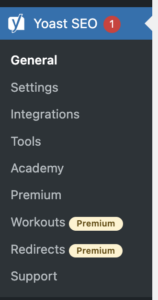
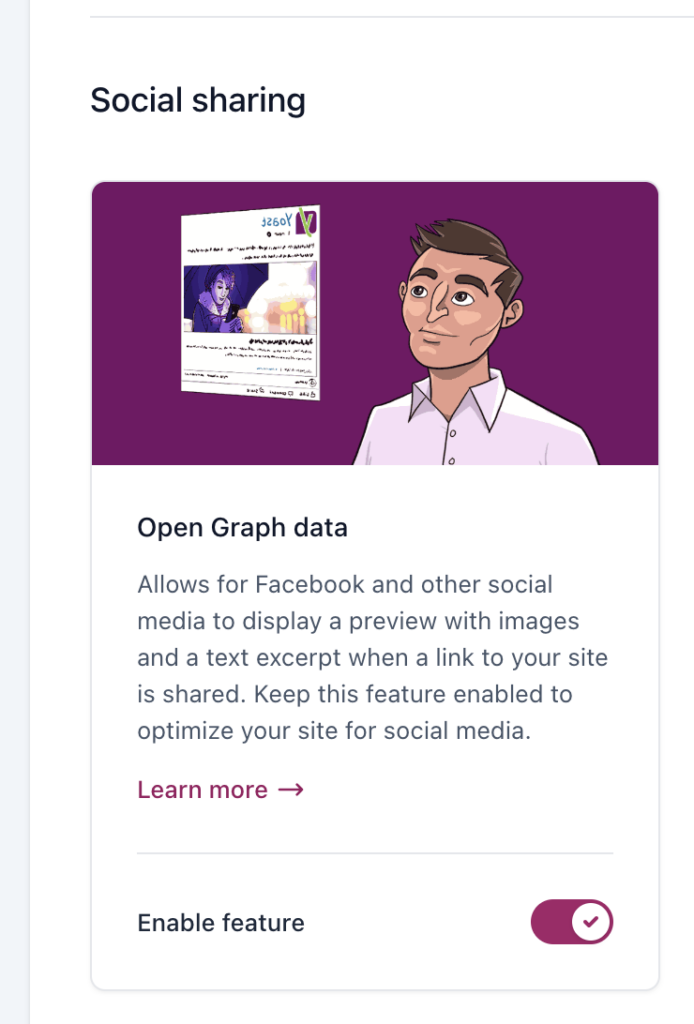
Step 3: Once in your Yoast settings scroll down until you see “Social Settings” and ensure the open graph setting is enabled. This should be automatic but just double check it. Once you have done this save your changes and you now have rich pins for articles on your blogs.
RELATED: A Step-by-Step Guide to Pinterest SEO Strategies for 2023
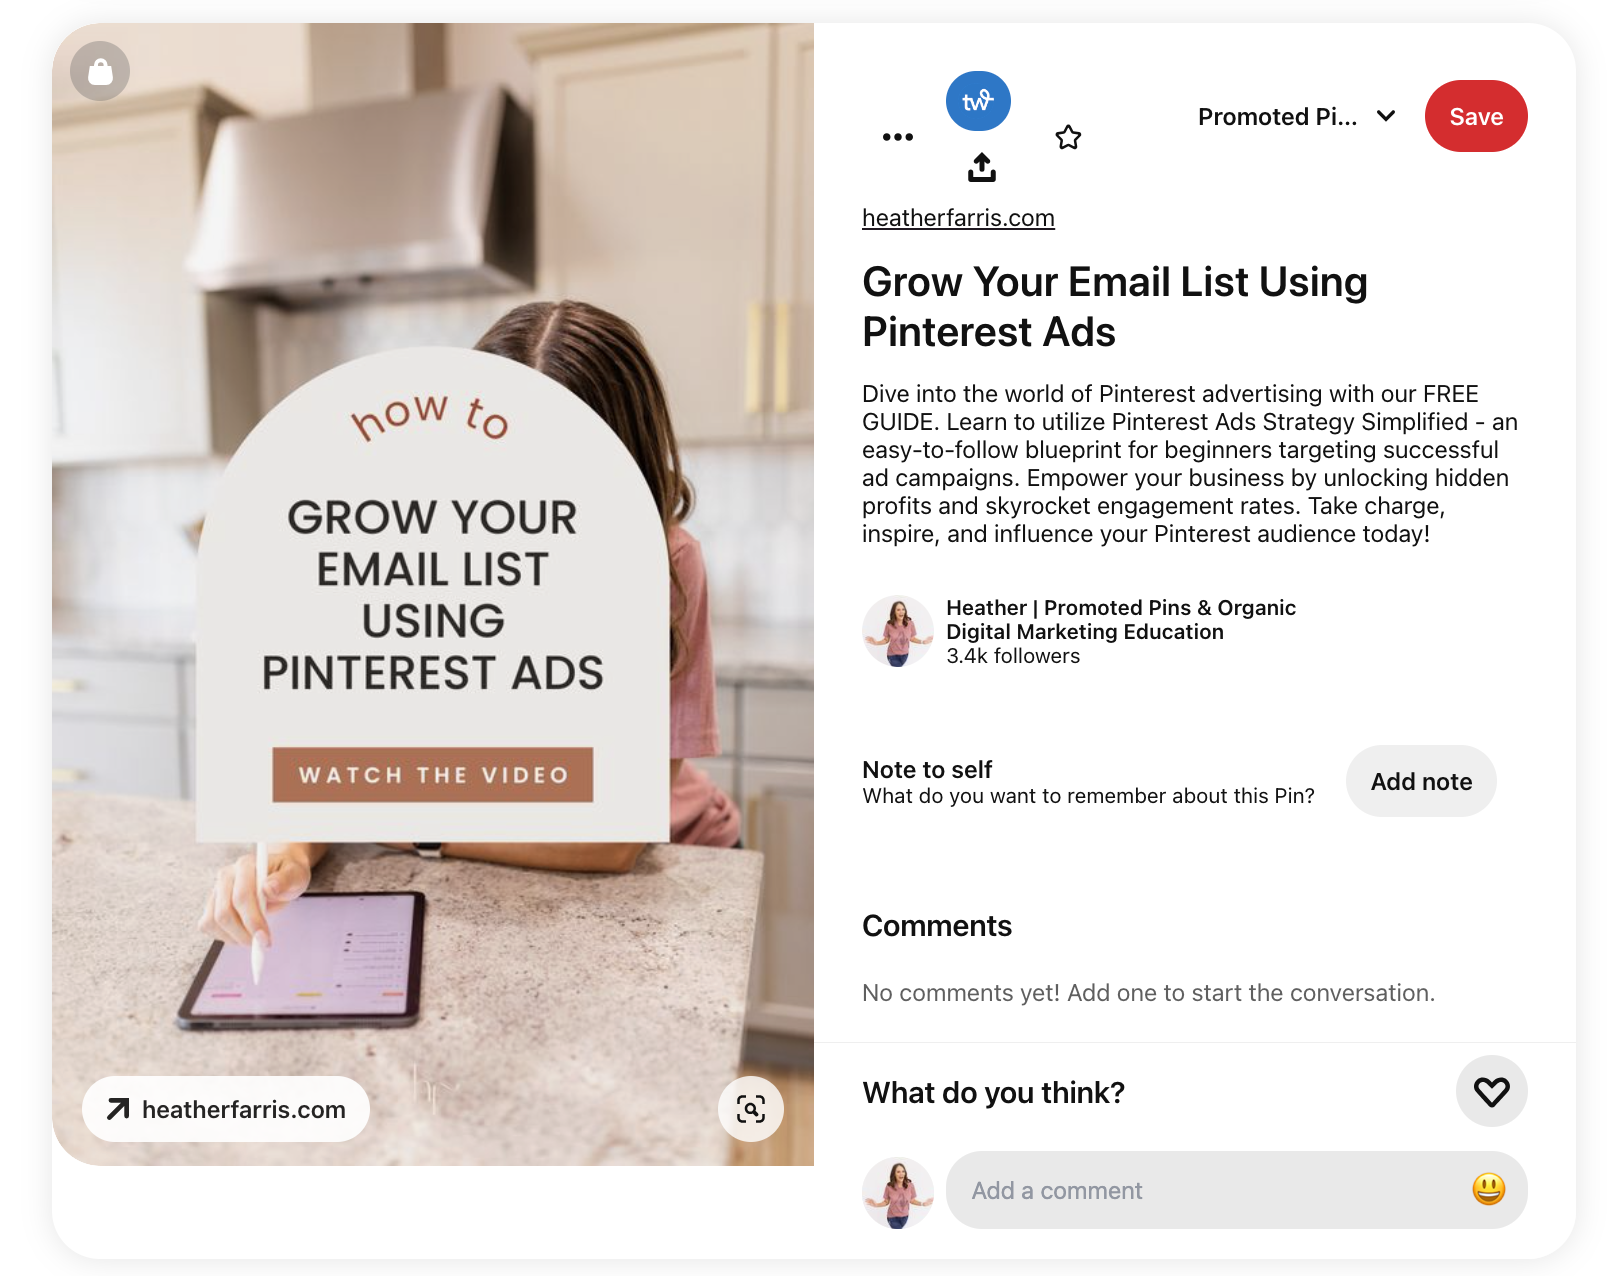
What Does a Rich Pin URL Look Like?
This is a pin from my blog with a basic url, with rich pins enabled.
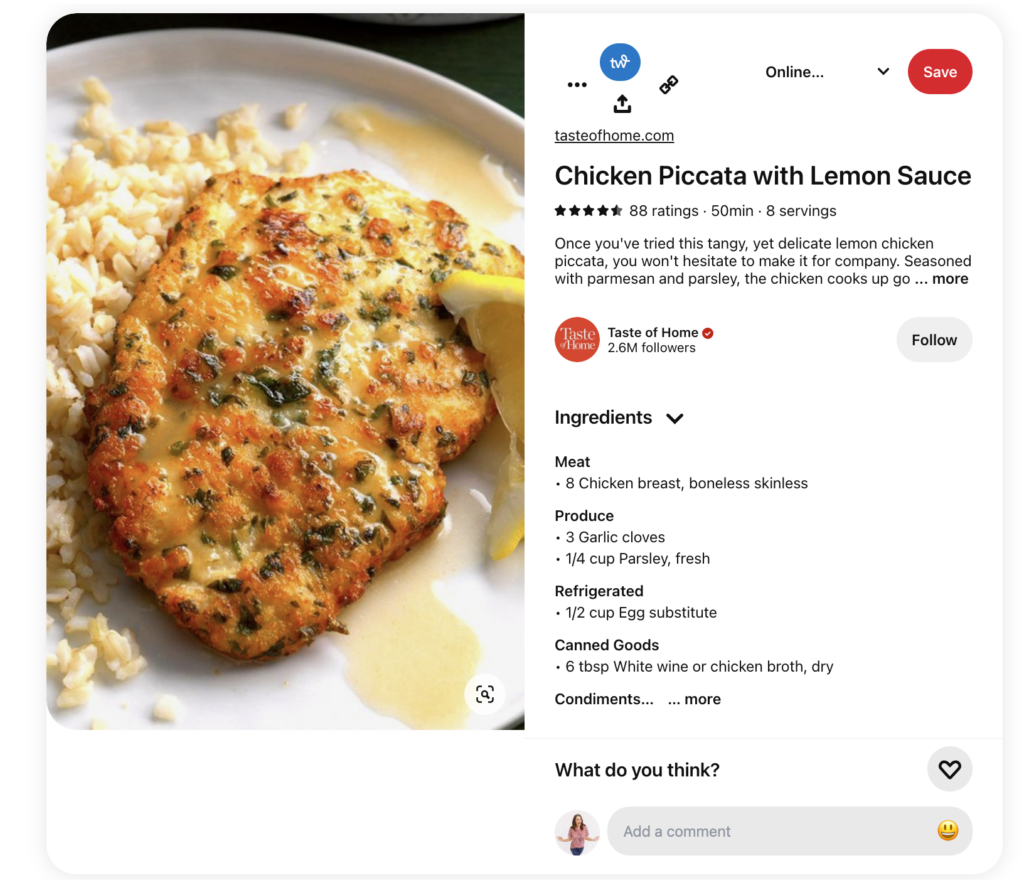
What Does a Recipe Rich Pin Look Like?
Here is an example of a recipe pin that has rich pins enabled. One just I found from a simple search and you can see how there is an added ingredients section.
How Do I Install Rich Pins for SquareSpace?
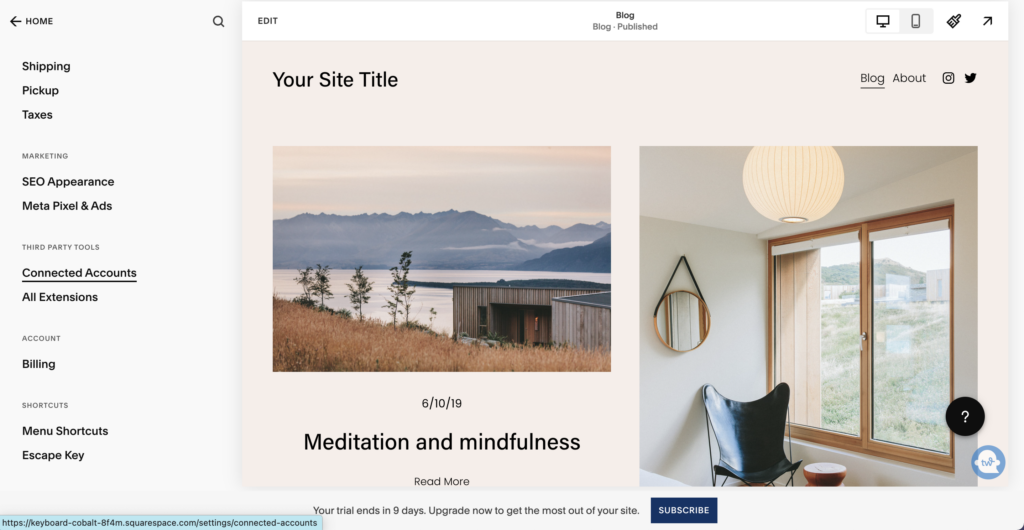
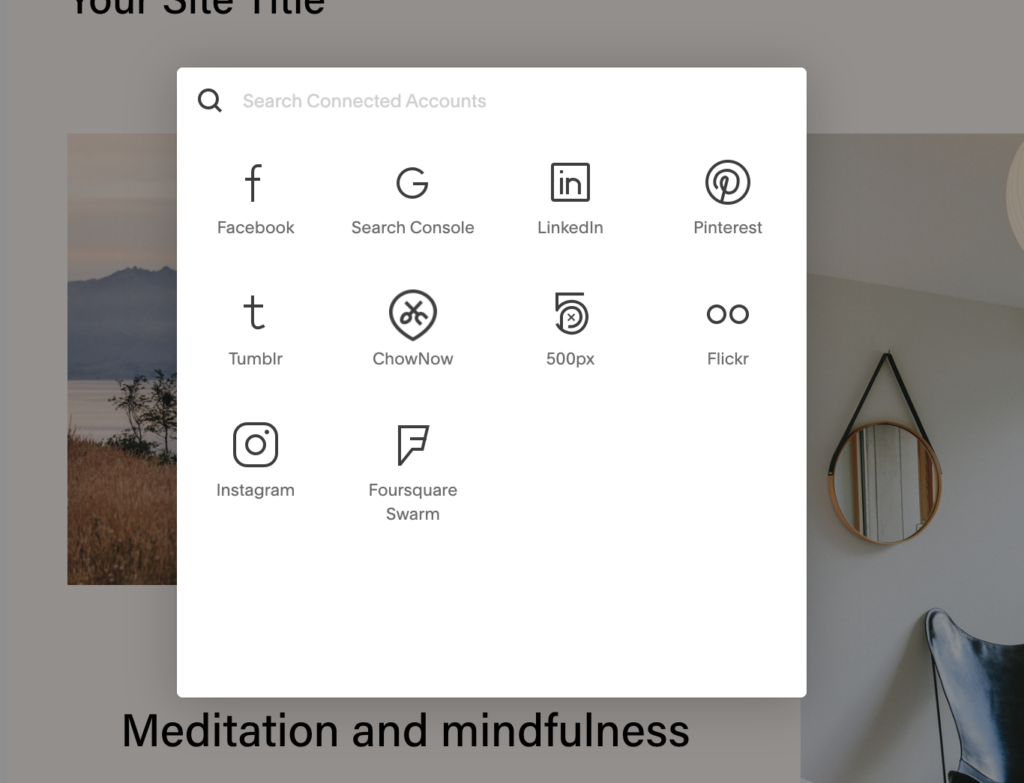
You simply need to connect your SquareSpace store in your integrations to Pinterest and you will have rich pins.
To do this you need to go to “Settings” > “Connected Accounts” and choose Pinterest.
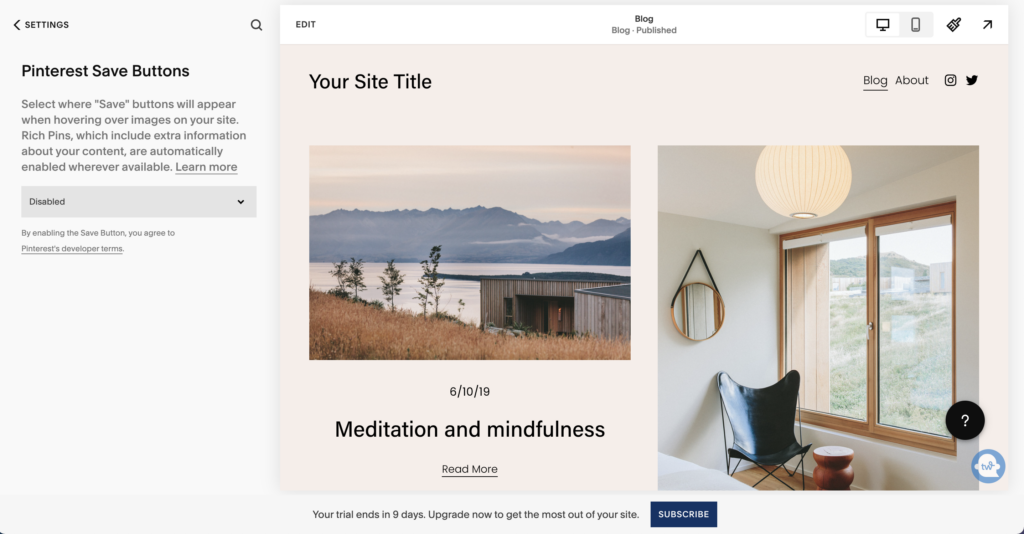
To get a sharing button for Pinterest you will want to add your Pinterest URL in the Pinterest save button panel.
How to Install Rich Pins on Shopify
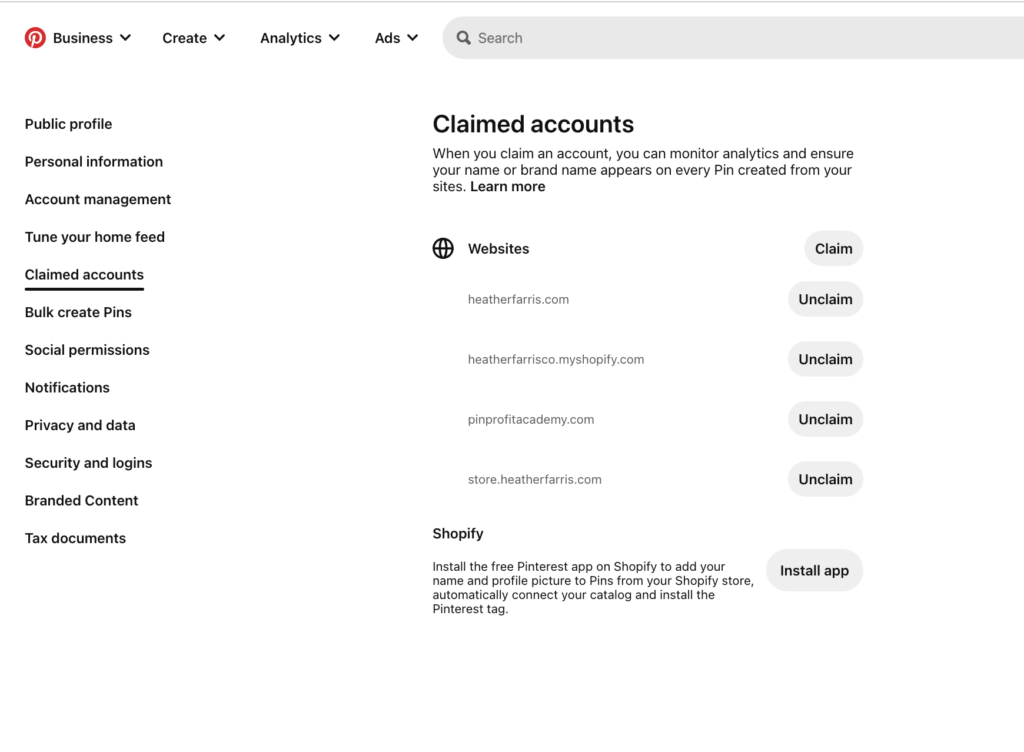
For Shopify you need to install the Pinterest sales channel and this will enable rich pins for your products. No need to do anything else. You can do this with either Pinterest in the claim settings page or through Shopify directly.
What Do Rich Product Pins Look Like?
This is a pin that leads directly to my Shopify store. It brings in the pricing and product details.
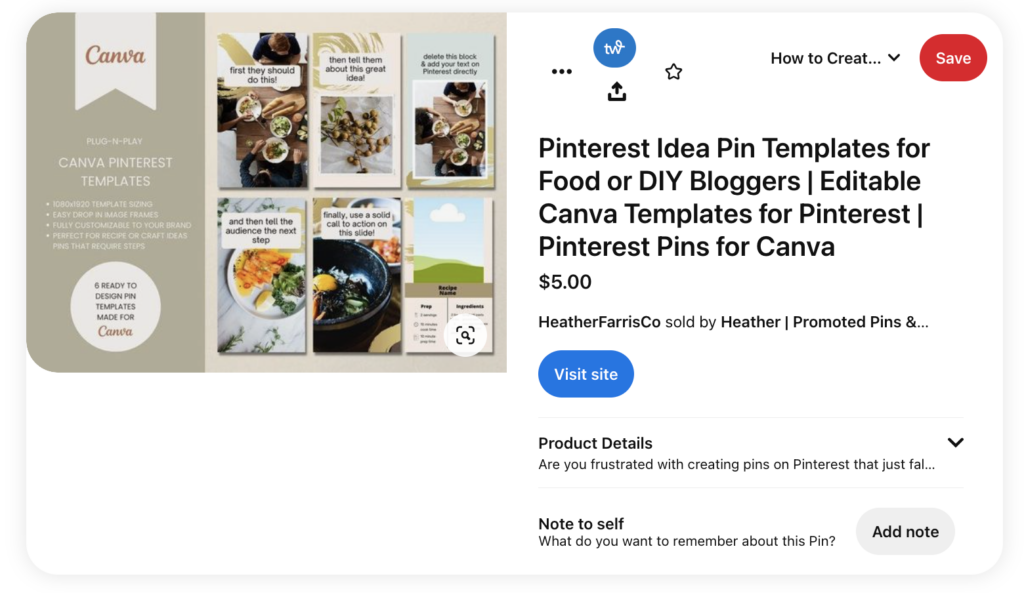
RELATED: How to Claim Your Shopify Website on Pinterest
The more information you can provide and the better your pins look and before the viewer clicks through, the more traffic and engagement you’ll receive with your pins. Make sure you follow this simple setup for how to enable rich pins and you’ll be good for every pin you make!
Pin It For Later

Heather Farris went to school for accounting and worked for years in banking and finance. After finding all of that entirely too boring she started her first blog in her basement in August of 2016. She has started 3 blogs in the marketing, motherhood and travel niches and used Pinterest to grow them all. She quickly became the go-to Pinterest strategist in her peer circles and has been implementing strategies, driving traffic and sales through organic and paid tactics for her clients. On this blog and her YouTube channel, as a renowned Pinterest marketing expert, she educates the public about clear and transparent marketing strategies to help them to grow on Pinterest and in other places online as a renowned Pinterest marketing expert.


